The fastest way to get an image into Figma is Shift + Command + K on Mac or Shift + Ctrl + K on Windows. Pick a file, click the canvas, and it shows up at its original size.
You can also drag a file onto the canvas or paste from the clipboard. Uploading through the Fill section of the color picker lands you in the same spot.
Figma has no dedicated image layer. A raster image becomes the fill of a rectangle, frame or other shape, which is why the Fill, Fit, Crop and Tile modes apply to it.
Files over 4096 px on the longest side get scaled down on upload. An SVG behaves differently and comes in as an editable vector layer (Figma Help Center, 2026).
How do you insert an image in Figma with the place image command?
Hit the shortcut, choose a file, then click the canvas. Figma drops the image in at its original size.
The same command sits in the Shape tools menu of the toolbar, labeled Image/video. Older tutorials still call it Place image.
- Open a Figma Design file where you have Can edit access.
- Choose Image/video from the Shape tools menu, or use the shortcut.
- Select one or more files and click Open.
- Click the canvas to place the image at its original dimensions. Click and drag to set your own size instead.
- Resize from the corners and hold Shift to keep the proportions.
Images work on every plan, free included (Figma Help Center, as of October 2026).
What Figma creates when you place an image
Placing a file doesn’t give you an image layer, because Figma doesn’t have one. What you get is a rectangle with the image applied as its fill.
The Layers panel marks that rectangle with an image icon, so it’s easy to tell apart from a plain shape.
Have you seen the latest Figma statistics?
Discover comprehensive Figma statistics including revenue growth, market share, user demographics, and funding data.
Check them out →Most of what follows comes from that one detail. Anything that can hold a fill can hold an image, frames and text layers included.
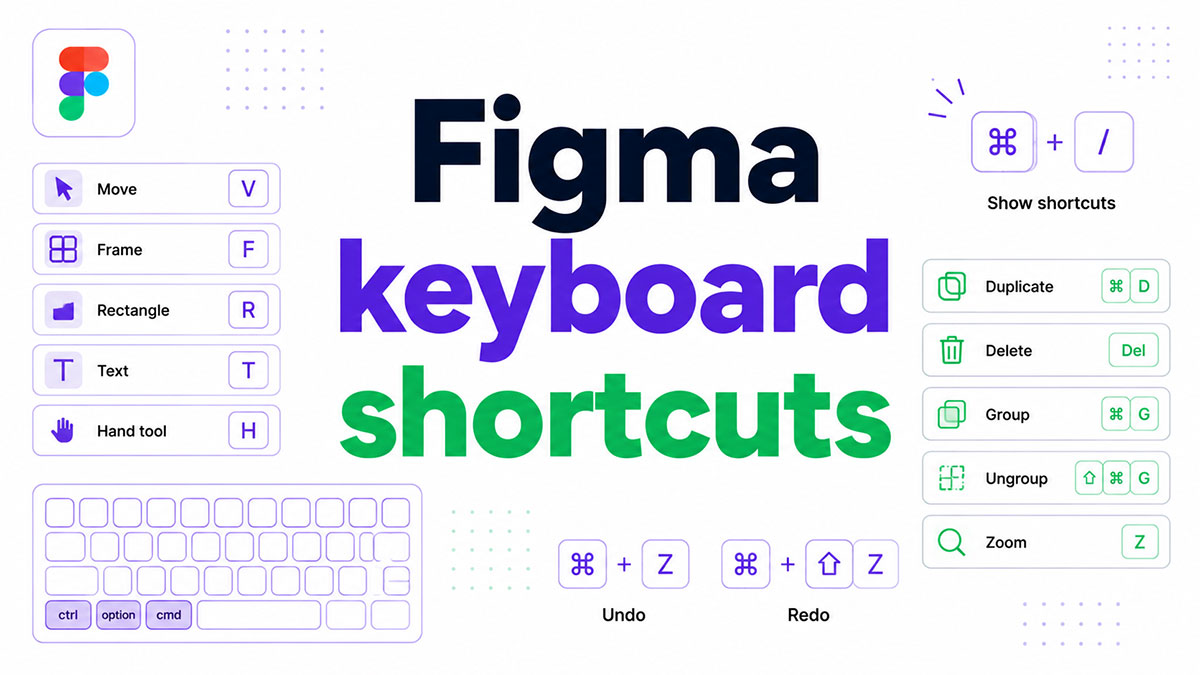
Place image is only one of the shortcuts Figma offers for everyday editing. Learn a few more and image-heavy files stop feeling so click-heavy.
Which insertion method fits which job?
Place image covers most jobs. Drag and drop works for a quick one-off, paste is handy for web images, and the color picker suits shapes that already exist. Photos that aren’t on your computer need a plugin.
Figma’s Help Center documents five upload paths. The table below keeps the ones that come up in daily work and adds plugins, even though they sit outside that list.
| Method | Best for | Limitation |
|---|---|---|
| Place image | Single files and batches from your computer | Files must already be on your device |
| Drag and drop | One-off images from a folder | Lands as a new layer wherever you drop it |
| Paste | Web images and screenshots, no download | With a layer selected, adds a new fill instead of replacing the old one, unless you select the fill row first |
| Color picker | Shapes and frames that already exist | A layer must be selected first |
| Plugin | Stock photos and asset libraries | Behavior differs from plugin to plugin |
Placing several images at once
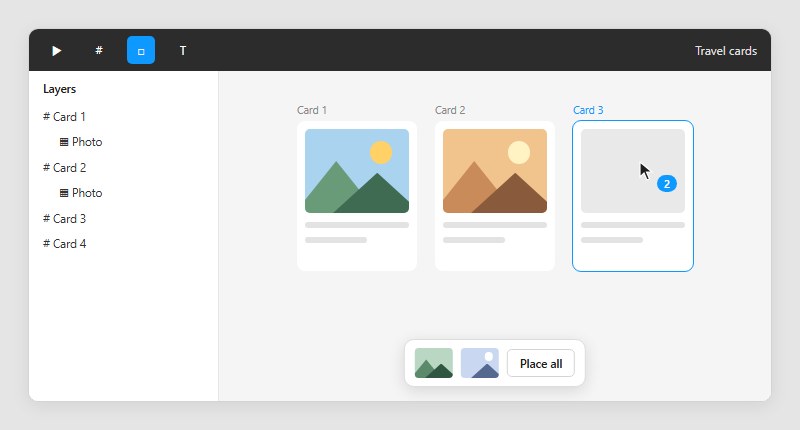
Select multiple files in the picker and the cursor shows a badge with the number still waiting to be placed. Click empty canvas and the next file lands in a new layer at its original size, while a click on an existing object swaps that object’s fill for the file. There’s also a Place all option that dumps whatever is left in one spot.
Press Delete to discard whatever is left in the queue.
This is the quickest way to fill a row of card frames. Pick the files once, then click each card in turn.
Plugins and URL-based insertion
Figma’s own list of upload paths has no URL option. Anything that pulls an image from a link comes from a plugin.
The official Unsplash plugin works on a selection. According to Unsplash, you pick one or more shapes, then insert a random photo, a preset category or a search result.
Plugins differ in what they create. According to IntelligenceBank’s help article, its Assets plugin places the image as a new layer inside a selected top-level frame or section, and fills a selected layer inside one with the asset instead. SVG files are the exception, because they cannot be used as a fill.
My rule is to select the target shape before running any plugin. Otherwise the result depends on that plugin’s defaults.
How do you put an image inside a shape or frame?
Select the layer, click the swatch in the Fill section of the right sidebar, pick Image and hit Upload from computer. Since the image is just the fill, the layer holds on to its size, corners and effects.
Using the Fill panel
Shapes, frames, text layers and vector networks all take an image fill. Until you choose a file, you’ll see a gray and white checker placeholder. The Stroke section has the same picker, so a border can carry an image too.
If no container exists yet, making a frame at the target size first gives the fill a clean target.
Placing onto an existing object
Run the place image command, pick the file, then click the object instead of empty canvas. Figma replaces that object’s fill with the image.
A click on empty canvas creates a new layer, and that’s the usual reason an image ends up next to the shape instead of inside it.
Fill or mask?
Fill is my default because the image becomes a property of the parent layer. Corner radius, strokes and effects stay put, and the photo can be swapped later without rebuilding anything. It suits rectangles, ellipses and frames with rounded corners, anything like cards and avatars where photos change, and any case where you want Fill, Fit, Crop or Tile control along with the image adjustments.
Masks make sense when the clipping shape is a text layer or a group. They’re also the answer when one shape has to clip several layers at once.
Figma’s Help Center says any layer can act as a mask, and masking is non-destructive. Layer order matters, with the mask sitting below the layers it clips, so it helps to read a full walkthrough of masking in Figma before relying on one.
What do the image fill modes do?
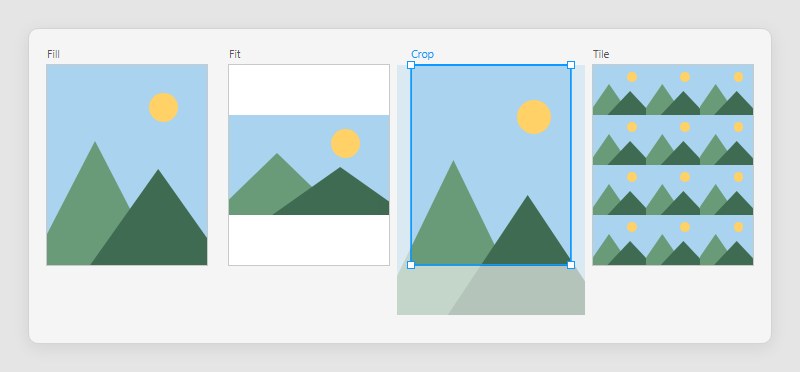
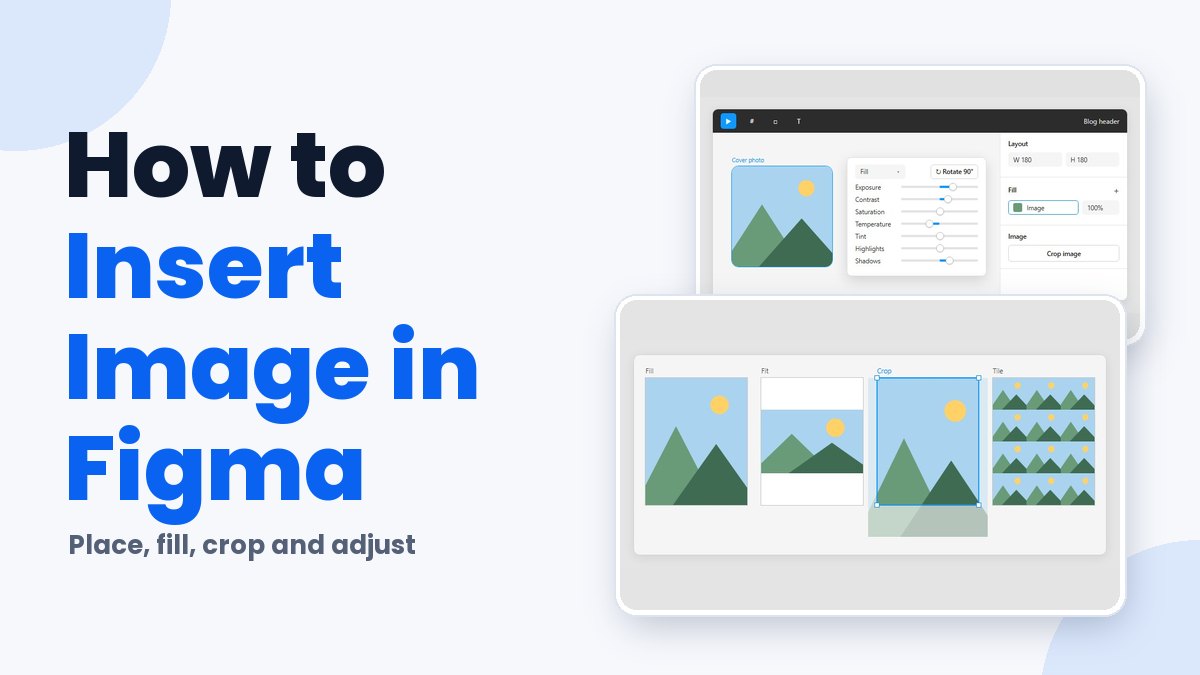
Fill, Fit, Crop and Tile control how the image sits inside the layer that holds it.
Select the layer, click the image thumbnail in the Fill section, and use the Fill mode dropdown. Figma keeps the chosen mode when you scale the layer.
Fill scales the image to cover the whole layer, which may clip the edges. Fit does the opposite and shows the entire image, leaving empty areas in the layer when the proportions differ. With Crop you drag the image boundary to choose the visible part, non-destructively. Tile repeats the image across the layer, and you set the tile size as a percentage of the original.
The image itself can’t be scaled, because it’s a fill. You scale the layer, and Figma repositions the image according to the mode.
The choice comes down to proportions. When the image and the layer have different aspect ratios, Fill clips and Fit leaves gaps.
Fill is the mode for a hero image that has to reach every edge of a banner frame. Fit is safer for product shots that can’t lose a corner.
Which image formats and sizes does Figma accept?
Figma accepts JPG, PNG, HEIC, WebP, GIF and TIFF, with TIFF working only in Safari. Anything larger than 4096 px on its longest side is scaled down to that limit.
The numbers worth remembering are short (Figma Help Center and Figma Developer Docs, as of October 2026). Six raster formats are supported, and the longest side can run up to 4096 px before proportional downscaling kicks in. An image counts as high-resolution once it goes past 512 x 512 px. Images added through the Plugin API top out at 4096 x 4096 px, in PNG, JPG or GIF.
TIFF is the one to watch. Convert it to PNG or JPG first unless your team works in Safari.
How Figma handles SVG files
An SVG doesn’t become an image fill. Figma converts it into an editable vector layer, so Fill modes and image adjustments don’t apply to it.
Because a scalable vector graphic keeps its paths, you can recolor, reshape and resize it without quality loss.
Vector is the better import for logos and icons. Photos and screenshots stay raster, and this breakdown of the difference between SVG and PNG covers where the line falls.
Resolution and the 4096 px cap
Figma downsizes proportionally, so an 8000 x 6000 px photo becomes 4096 x 3072 px.
Some file metadata may be lost in that resize, according to Figma’s Help Center. Keep the original file as your source of record.
At 2x density, 4096 px covers a frame up to 2048 px wide. A full-width banner on a larger frame can look soft in a 2x export for that reason.
How do you edit an image after inserting it?
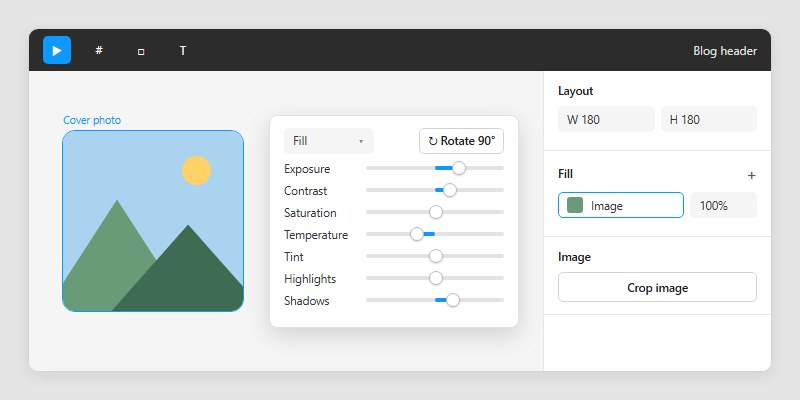
Select the layer and open the Fill section of the right sidebar. Trimming, swapping and color work all start there.
Crop and the sliders are non-destructive, so the original stays intact underneath.
Crop an image
Double-clicking the image layer activates the Crop tool. There’s also a Crop image button in the Image section of the right sidebar, and you can set the dropdown behind the Fill swatch to Crop.
Drag the blue handles to crop by eye. The slider takes an exact value, and the aspect ratio picker has ratios to choose from. Click the canvas or press Enter to apply.
The cropped area is hidden, not deleted. Reopen the tool and the full image is still there.
By default, Figma keeps the aspect ratio of an image while you crop or resize it. Hold Control or Fn to change the aspect ratio instead. Holding Command (Mac) or Ctrl (Windows) while you drag a corner gives a quick crop, and holding Option (Mac) or Alt (Windows) also moves the opposite side.
The tool has more variations than fit here, and a dedicated guide to cropping in Figma goes through them.
Replace an image
You can swap an image at any time without rebuilding the layer. Figma keeps the fill mode settings, including cropping and positioning.
Drag a file over the asset preview in the color picker, or over the swatch in the Fill or Stroke section. Pasting works too, once you’ve selected the fill row itself.
For the paste route, select the area just to the left of the fill swatch in the right sidebar, then paste. That is the step Figma’s paste documentation gives for replacing an existing fill. Without it, the pasted image is added to the layer as an extra fill instead of replacing the old one.
Selecting the row also lets you replace only the photo while a gradient layered on top stays untouched.
Adjust exposure and color
Click the image thumbnail to open the adjustments. The seven sliders work like photo-editor filters, and Figma’s Help Center says they can be reversed or updated at any time.
Exposure, contrast, highlights and shadows handle light. Saturation, temperature and tint handle color.
Temperature and tint together set the white balance. Drag a slider left for a negative adjustment and right for a positive one.
When does inserting an image fail or look wrong?
Most problems come from high-resolution versions loading late, the 4096 px downscale, clipboard behavior on image fills, or connection and extension interference. Each has a documented fix.
Symptoms, causes and fixes
| Symptom | Cause | Fix |
|---|---|---|
| Image looks blurry on open | High-res versions load only for images in the current viewport | Pan to the image or reload the tab |
| Image is smaller than the source | Longest side passed 4096 px and was scaled down | Keep the original file as reference |
| Images missing in presentation view | A browser extension such as an ad blocker | Allow figma.com or disable the extension |
| Image rotated the wrong way | Browser EXIF handling changed in 2020 | Rotate the fill once |
Figma’s list of extensions known to block images is dated August 2020. It names Ghostery, Honey, Video Downloader PLUS and the iDM Integration Extension, so treat it as a starting point rather than a current list.
Paste into a fill and the fill mode reset
Pasting into an existing image fill broke for many users in 2025. A forum thread opened on April 1, 2025 grew past 50 replies, and Figma Community Support later said a fix had rolled out so pasting works again with the fill panel open.
Users in the same thread said the fix did not restore the old workflow, which was pasting a new image over an existing fill in one step. Both positions are on record.
The safer route is dragging a file onto the Fill swatch, since Figma’s documentation says that method keeps fill mode, cropping and positioning.
A forum feature request, opened in 2021, reports the opposite for pasting, with a new image in a layer or component resetting a Fit setting back to Fill. That report is user-sourced, not documented behavior.
Outages and lost images
Figma’s status page logs a service disruption on 20 and 21 October 2025, caused by failures in AWS and other dependencies. It lists the real-time collaboration server and REST API as affected.
Figma Community Support tied that event to some users being unable to load their images. Later, other users reported frames that no longer showed images, version history included.
If images go missing outside an incident window, refresh the tab and check version history first. Then file a support ticket with Figma’s technical quality team, which is the route Figma Community Support names in that thread.
FAQ About Inserting an Image in Figma
Does Figma let you insert images on a free plan?
Yes. Images are available on every plan, free included, and the only requirement is Can edit access to the file.
What else changes between tiers is covered in this comparison of how Figma’s free and professional plans differ.
Can you insert a GIF in Figma?
Yes. Figma accepts GIF files and labels them GIF in the Fill section, with a Video/GIF icon on the layer in the Layers panel.
They go in the same way as any other image, through place image, drag and drop, or the color picker.
How do you rotate an image inside a shape without turning the shape?
Click the image thumbnail in the Fill section and use the Rotate 90º setting. Each click turns the fill 90 degrees clockwise and leaves the shape alone.
For other angles, switch to Crop and rotate freely. Turning the whole layer is a different job, covered in this guide to rotating a layer in Figma.
Is there a way to reuse an image fill on another layer?
Yes, by copying the fill instead of the layer. Select the fill row, copy it, select the target layer, and paste, as answers in the Figma Community forum describe.
Copying all properties also carries corner radius and effects, which is rarely what you want.
How can you remove the background from an inserted image?
Figma’s Help Center lists background removal among its Figma AI image tools.
The Remove BG plugin from Figma Community does the same job. Run either one after the image is placed.
Setting Up Image Fills for Easy Photo Swaps
Inserting an image in Figma pays off most when the image fill is configured once and every later photo goes in by drag. Set the fill mode and crop first, make the duplicates next, and swap photos last by dragging files onto the Fill swatch.
Figma carries fill mode, cropping and positioning across a replacement, so each duplicate inherits the setup before any photo changes.
One shared crop works for photos with similar framing. A portrait with an off-center subject needs its own adjustment.
Checked against Figma’s documentation on 27 October 2026, dragging a file onto the Fill swatch is the replacement route documented to keep those settings. Figma also documents paste-to-replace through the fill row, but forum reports on it are mixed, so test one card before relying on it for a whole batch.
Turning the finished layer into a reusable card or avatar is covered in this guide to making components in Figma.

Many of his resources are available on various design marketplaces. Over the years, he's worked with a range of clients and contributed to design publications like Designmodo, WebDesignerDepot, and Speckyboy, Slider Revolution among others.
- How to Insert Image in Figma With Ease - November 3, 2026
- How to Download Figma Files Fast and Free - October 30, 2026
- Figma Keyboard Shortcuts That Will 10x Your Speed - October 25, 2026